Later!
Blog about building a home layout in H0 that has the Southern Pacific as example. Timeframe will be around 1980 to 2000, the period of the sell-out to the Union Pacific. The modeled line will be the Cascade line.
dinsdag 31 mei 2016
maandag 30 mei 2016
More module work
The middle modulestill needed some work. The front valance had to be made, I cut it out of some rest material:
Spiked and glued to the module:
Fitting the width of 2 LED strips:
Cut out pieces which will carry these LED strips:
The result. This way the module takes 3 wood strips of 3 centimeters wide which each can hold up to 2 LED strips:
Later more!
donderdag 26 mei 2016
More work
I wasn't satisfied with the modified parts on the end of the bridge, so I re-modified them:
Cut them open, the first one broke in this attempt::
But, glue does wonders:
I had some left-over material from the previous cutting so I used these parts:
Both parts re-modified:
Time for painting. Mat black:
And iron colour:
I also painted the base of the machine housing:
The housing in progress:
Time for gluing the first side to the base. I cleaned the parts od paint so the glue will join better:
And glued together. Some elastic bands are used for fixating the parts:
Machine house almost ready:
My workspace for today:
The base of the machine house glued to the side of the bridge:
Testfitting the house:
And the second half of the bridge is glued to the base:
Later more!
dinsdag 24 mei 2016
Building goes on
First modification is the end plate. Has to go from 2-track to 1-track:
First cutting:
Second cutting:
New 3-part to 1 part:
Glued together:
Test fitted on the bridge:
Both modified end parts:
In the middle of the bridge there are 2 reinforcement sets. This is one set as in the kit:
One part ready for cutting:
First cut so that the middle part is out:
Then the middle part is cut:
So that we end up with a new 3-piece part glued together:
Testfitting for the width of the bridge:
Making a second piece:
And the new set is ready:
And test fitted on the bridge:
I'm satisfied, more to come!
Painting
Time to spray paint the parts. I use spraycans fronm Revell, no 8 black for base colour and no 91 iron for top colour.
Floor:
Sides
All in base colour:
All in iron colour:
Later!
maandag 16 mei 2016
Starting the bridge; part 2
Hi all,
Well, the bridge is already on its way. Here some pictures.
Parts:
Almost ready:
More to come!
Well, the bridge is already on its way. Here some pictures.
Parts:
Base:
Base with turn plate:
Bearing of Delrin:
Instead of 2 parts it will get 1 (because it will be 1-track):
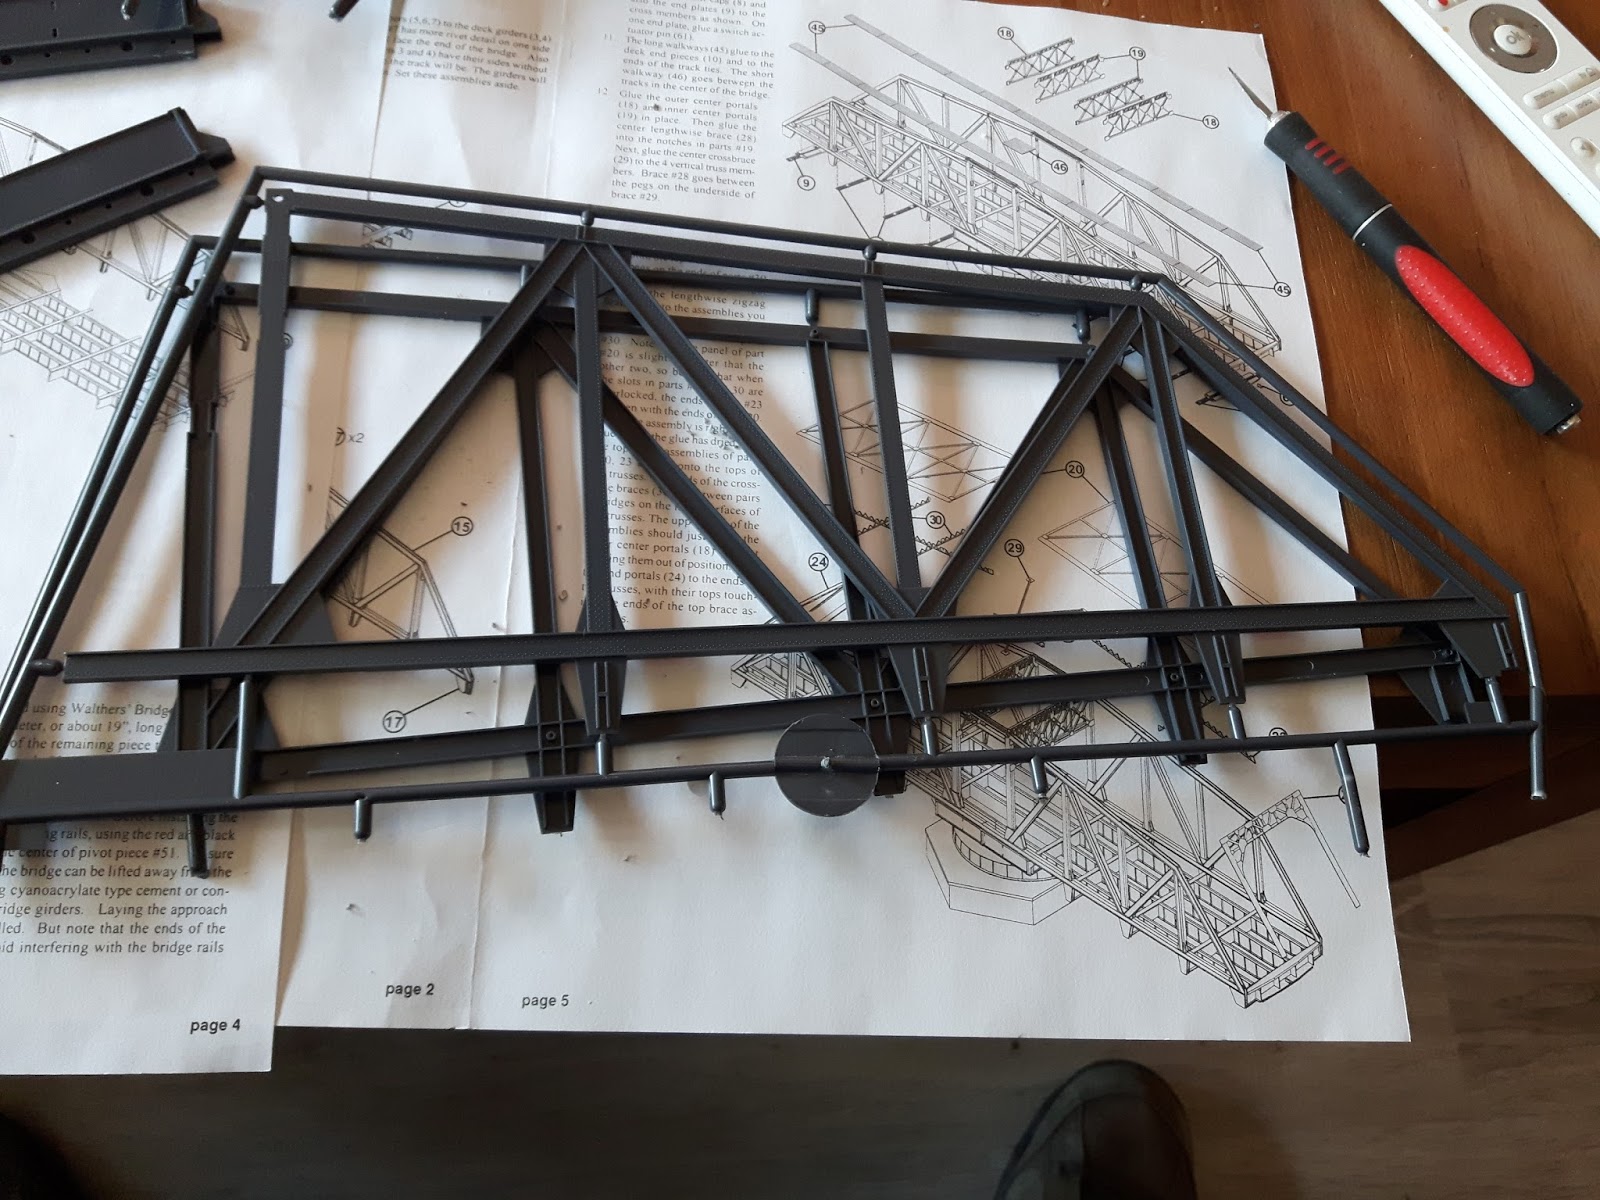
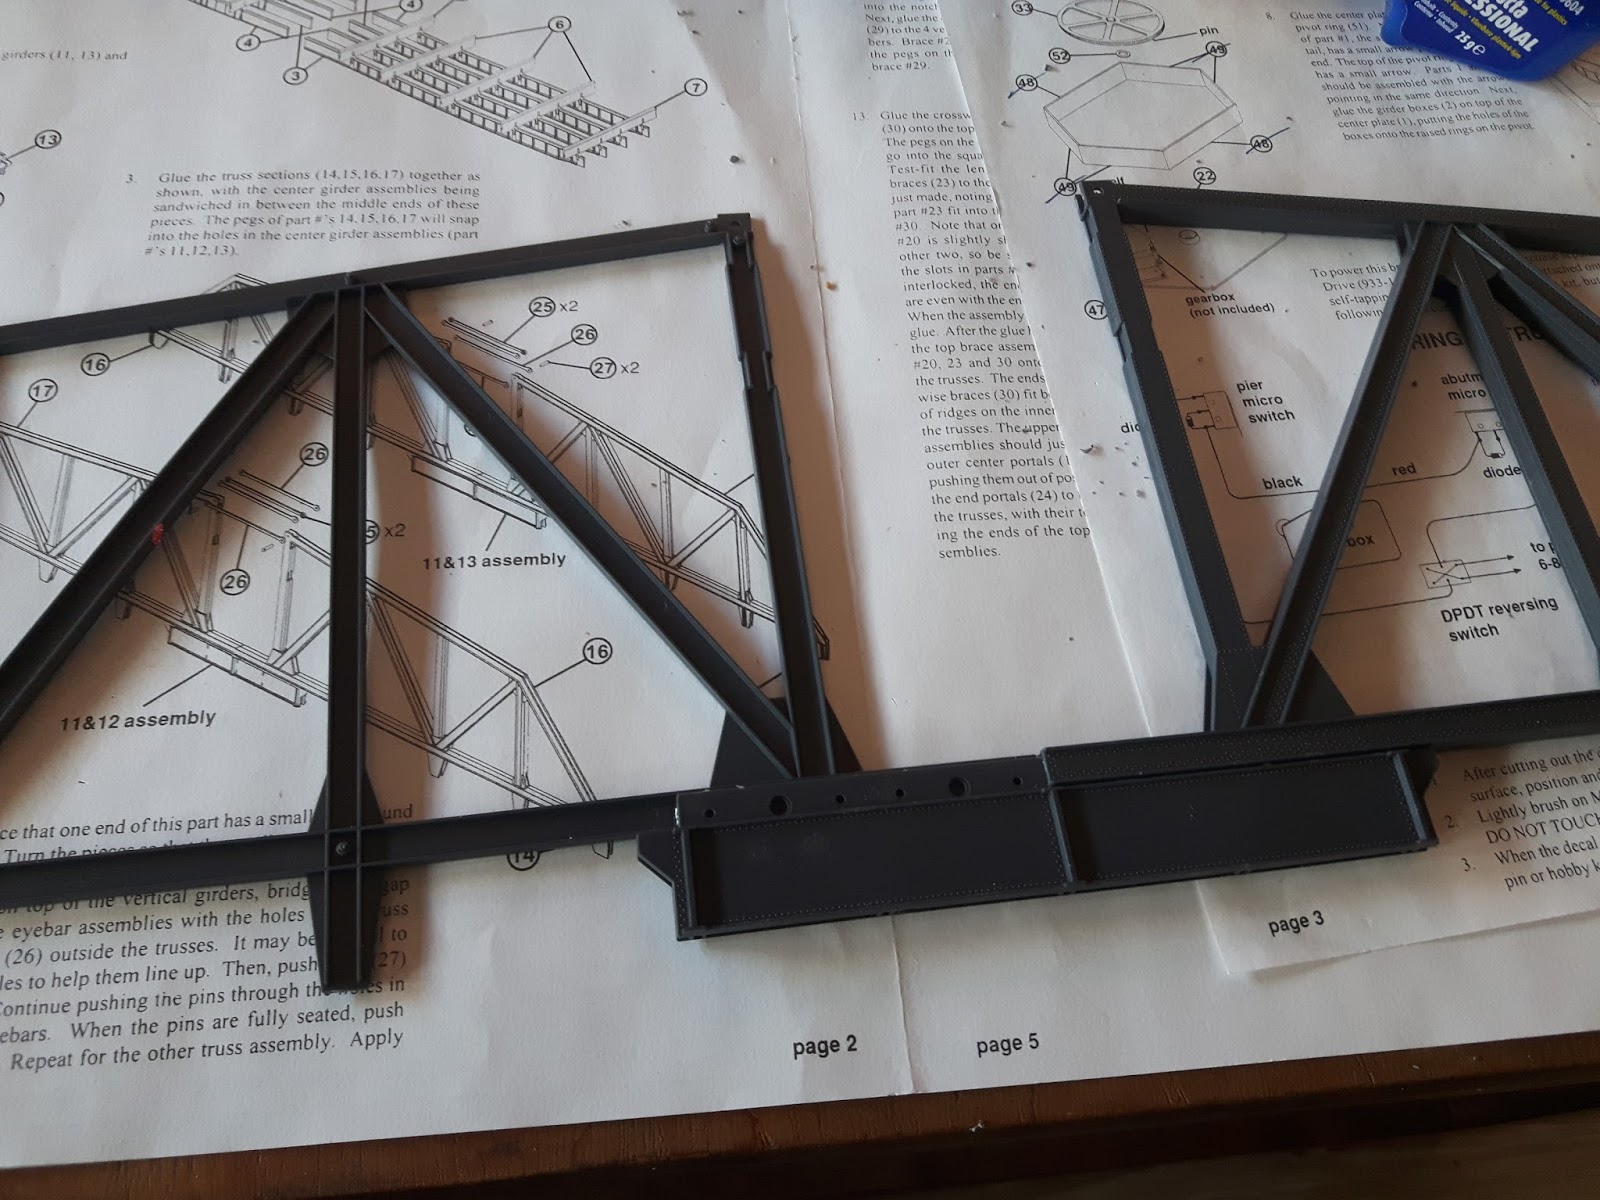
The parts that will build the connecting pieces between the bridge side halves:
Sorting out the side halves:
First halve. 2 pieces make 1 halve bridge side piece:
2 connected to the middle piece:
One side ready, one to go:
Connecting top rods:
And mounted:
Both sides ready:
Now work starts with the bridge floor. It has to be made smaller from 2-track to one track. So the cross pieces has to be shortened with a saw:
Using 2 restpieces to line up the new shortened piece:
2 modified with one original:
Set of 5 for one halve floor:
The Trumpeter saw I use for this modification:
Mounting the new pieces:
To one half floor:
And both pieces ready to mount:
The mounting piece:
Glued to one halve:
And the second piece, ready to be glued to the first:
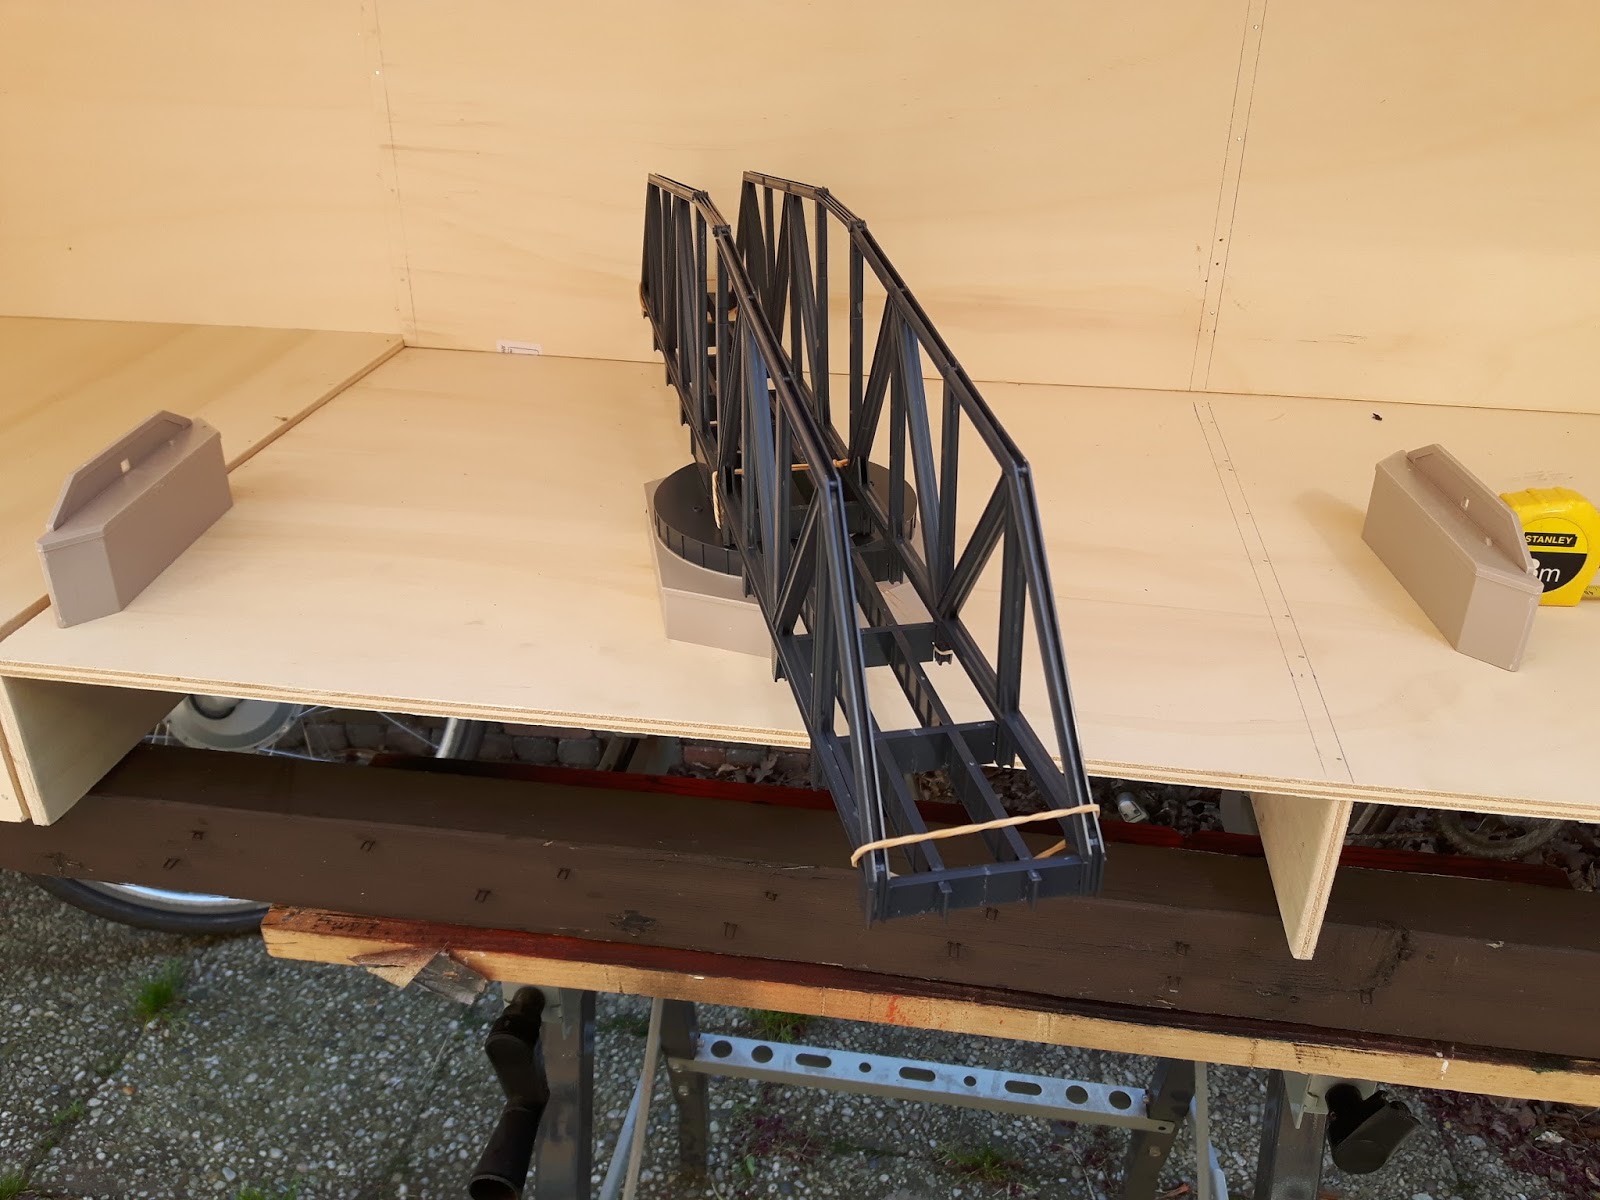
And the mockup looks like this. I am satisfied!:
The end piers:
And a module mockup with the bridge:
Right side with the short bridge:
Middle where one of two Central valley bridges will come:
Left where the second Central Valley bridge will be:
Overview with closed and opened bridge:
And the idea drawn in:
Abonneren op:
Reacties (Atom)


