Posts tonen met het label Scenery. Alle posts tonen

dinsdag 9 augustus 2016

Painted the bridgewalls today:


I think still too dark.
Determined the swing of the bridge and draw that on the layout:


Made a drawing for the right short trestle. Starting with a piece of A4 paper:


Marked the end points:


With the help of this tool once belonged to my dad (he was a carpenter):


Drawing the lines:


And glued it on a piece of board:


Oeps... had to be mirror image so I made a new one and glued that on the other side of the board:


Measuring out the place of the ties:


And the stuff needed to make this drawing:


With the drawing of the kit and the SP plans I can make a fairly precise copy of it:


And in the layout to see if it will fit:


More to come!

maandag 1 augustus 2016

Bridge building

Made the drive with the end switches for the swingbridge:


Mounted the second switch in the pilon instead on one of the bridge ends:


In place:


Got my second shipment from RD Hobby from Germany:


Making the second set of bridge pilons:


The set:


Test fitting:


Started the 2nd bridge build sunday afternoon:


Base parts:


Glued together:


Side parts:


Ready:


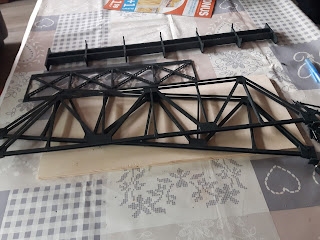
Top piece with reinforcements:


Bridge subassemblies:


 Test fit:


On the layout:


See through:


Other side:


And with opened bridge:


Movie:


woensdag 27 juli 2016

Big update

Hi all,

A big building update today. I did a lot after the last post.

The layout in the garage at home without her legs:


And with:


Starting the landscaping with 5 mm XPS:


Building up the right corner of the layout:


The bridge


And a Google streetview of the place:


Fitting the bridge with shoes:


Making the bridge headwall:


Cut out:


Corner wall:


And glued together:


Measuring out the trackbed with 5 mm plex:


Gluing and drying with extra weight:


This is what it looks now:


From a lower angle:


left side building op the landscape and refitting the trackbed with a thinner piece of plex::


Fitted:


Overview:


Getting the pilons kit:


The parts (times 2):


There are scribe lines to fit every possible height and width:


First pilon:


Side piece has to be trimmed in height:


On its place on the layout:


Level out with a 6 mm thick piece of plex:


Fitting the bridge with the shoes provided in the kit:


Making pilons:


Woodpiece for measuring up the 4 pieces of one pilon:


Scribed:


And gently broken:


Overview:


See through:


Side view:


Right side:


Overview:


Mocking up the wood trestle:


More to come!

Grtz, Ronald.